Add as Preferred Source on Google plugin displays a banner and inline button on your website that directs visitors to Google’s preferred sources feature. When clicked, the banner takes users to Google’s preferences page where they can add your site as a preferred source for their personalized search results.
What it does:
- Displays a customizable banner on your website
- Links to Google’s preferred sources feature
- Allows users to set your site as a preferred source in their Google Search settings
- Provides banner customization options (colors, text, position)
- Includes device-specific display controls for the banner (show it on mobile, desktop, or both)
- Controls exactly where the banner appears with Display Rules (all pages, posts only, pages only, or front page only)
- Excludes specific categories or individual posts/pages from showing the banner
- Triggers the banner immediately on page load, after the visitor scrolls a set percentage, or after a time delay
- Controls what happens after a visitor closes the banner – hide it for a configurable number of days, or show it again on every page view
- Tracks impressions, clicks, and dismissals with a built-in 30-day analytics dashboard
- Shortcode – drop [preferred_source] anywhere you want the button: mid-article, in a widget, or in a page builder
- Block editor block – an “Add as Preferred Source” block with style, alignment, text, and color controls in the sidebar and a live preview as you type
- Template tag – call adasprso_preferred_source() from a theme file for spots a shortcode cannot reach
- Its own Shortcode settings tab – manual placements have their own style, wording, and colors, separate from the automatic inline button
- Localized Google badge – the official badge ships in 17 languages, with an Auto mode that matches your site language
- Dark and Light badge themes – pick the badge variant that best fits your design
- Custom text badge – type your own button label for any language not in the built-in list; the badge renders with the Google logo in the same style as the official badges
- Inline badge style switcher – choose from six layouts: Default (full card), Simple (badge only), Strip (slim single line), Pill (compact rounded chip), Link (editorial text with inline badge), or Boxed (icon tile with an action button)
- Inline button with its own position (above content, below content, or both), post type targeting, color pickers, and customizable title and subtitle
- Automatically clears page caches from popular caching plugins when you save settings, so changes go live immediately
About Google Preferred Sources:
Google’s preferred sources is a feature that allows users to indicate which sources they want to see more of in their search results. This is a Google feature, not affiliated with this plugin. Users who add your site as a preferred source may see your content more frequently in their personalized search results.
DISCLAIMER: This plugin is not associated with Google and was created to help website owners make a banner and inline card for adding their sites to Google’s Preferred Source. The term “Google” is used solely to convey the plugin’s function, and we are not related to Google in any way.
Thank you for using the Add as Preferred Source plugin 🙂 If you like it, please leave a ★★★★★ rating to support us on WordPress.org to help us spread the word to the community.
3 Ways to Let Visitors Add Your Site:
On the Implementation Method tab, pick whichever of these fits you best. You can switch anytime, and it takes one click.
- Simple Link – The classic option. We show your badge or banner, and it links straight to Google’s page where the visitor adds your site. Nothing to load, nothing to set up.
- Your Own Design (recommended) – Keep the exact look you already have – your colors, your text, your badge – but have it talk to Google the “official” way behind the scenes, instead of just a plain link.
- Google’s Own Button – Let Google handle it completely. Google shows its own ready-made button on your site, in light or dark, in the visitor’s own language. The fastest option if you don’t want to fuss with any design at all.
Place the Button Exactly Where You Want:
The banner and the inline button are placed for you automatically. When you want to decide the spot yourself, there are three separate ways to do it – all of them share the settings on the Shortcode tab, so they look identical wherever you use them.
- 1. Shortcode –
[preferred_source]works anywhere shortcodes run: the post editor, a Shortcode block, a text widget, or most page builders. Attributes let you override any setting for that one placement, for example[preferred_source style="pill" align="left"]. - 2. Block – the “Add as Preferred Source” block for the block editor (Gutenberg). Search for it in the block inserter, drop it in, and set the style, alignment, text, and colors in the block sidebar. The block previews the real button right in the editor, so you see the result before you publish. Nothing to type and no shortcode syntax to remember.
- 3. Template tag –
<?php adasprso_preferred_source(); ?>in a theme file, for a sidebar, header, footer, or custom template where a shortcode cannot go.
Manual placements are independent: they ignore the “Enable inline button” toggle, the post type list, and the banner Display Rules. Where you put the button is where it appears.
Plugin Features:
- Custom domain override for the Google Preferred Source link
- Customizable banner text with website name variable
- Color customization for background and text
- Position control (top or bottom of page)
- Device-specific display for the banner (mobile, desktop, or both) – the inline button is not affected by these settings and appears on all devices
- Cookie-based dismissal with a configurable hide duration (1-365 days, default 7), or switch to showing the banner again on every page view
- Responsive design
- Translation ready
- Display Rules – show the banner everywhere, on posts only, pages only, or the front page only; exclude specific categories or individual post/page IDs
- Display Trigger – show immediately on page load, after the visitor scrolls a configurable percentage of the page (10-90%), or after a set time delay (1-60 seconds)
- Click-Through Analytics Dashboard – view 30-day impressions, clicks, dismissals, and click rate with a visual bar chart directly in the admin
- Badge Language – choose from 17 official badge languages (Danish, German, Spanish, Estonian, Finnish, French, Hindi, Hebrew, Japanese, Korean, Norwegian, Brazilian Portuguese, Russian, Swedish, Turkish, Ukrainian, and English), or leave it on “Auto” to match your site language
- Badge Theme – switch between the Dark (default) and Light versions of the official Google badge, with a live preview in the settings
- Custom Badge Text – type your own button label for any language not in the built-in list; the badge renders with the Google “G” logo matching the official badge style
- Inline Button – an in-content card with its own enable toggle, position (above content, below content, or both), post type targeting (posts, pages, and custom post types), background and text color pickers, and customizable title and subtitle
- Inline Badge Style – switch the inline button between “Default” (full card), “Simple” (badge image only), “Strip” (slim single line), “Pill” (compact rounded chip), “Link” (editorial text with inline badge), or “Boxed” (icon tile, headline, and action button)
- [preferred_source] Shortcode – place the button by hand anywhere shortcodes run, with per-placement attributes for style, alignment, text, subtitle, colors, and CSS class;
[adasprso_preferred_source]is available as an alias if another plugin already uses the short tag - “Add as Preferred Source” Block – a native block editor block with sidebar controls for style, alignment, text, and colors, and a live server-rendered preview inside the editor
- Template Tag –
adasprso_preferred_source()for theme files, taking the same options as an array - Shortcode Settings Tab – manual placements get their own badge style, alignment, wording, and colors, kept separate from the inline button, plus a live preview, copy-to-clipboard snippets, and a full attribute reference
- Avoid Duplicates – optionally skip the automatic inline button on posts that already place the button by hand
- Automatic Cache Clearing – saving settings purges page caches from popular caching plugins (WP Rocket, W3 Total Cache, WP Super Cache, LiteSpeed Cache, and more) so changes go live immediately
- Lightweight and Accessible – CSS and JavaScript load only on pages that actually show the banner or button, assets are minified, and the banner is fully keyboard accessible
Technical Requirements:
- WordPress 5.0 or higher
- PHP 7.2 or higher
- Modern web browser with JavaScript enabled
Configuration
After installation, go to Settings > Add as Preferred Source in your WordPress admin to configure the plugin.
Step 1: Basic Settings
-
Enable Banner: Check this box to activate the banner on your website. The banner will not appear until this is enabled.
-
Website Name: Enter your website or publication name. This defaults to your WordPress site title but can be customized. This name will replace the {website_name} placeholder in your banner text.
-
Custom Domain: Override the URL used in the Google Preferred Source link. Leave this empty to use your site’s domain automatically (recommended). Only set this if the link should point to a different URL – for example, if your WordPress site lives on a subdomain but your canonical domain is
https://example.com. -
Banner Text: Customize the message displayed to visitors. Default text is “Add as a preferred source on Google”. You can use the placeholder {website_name} anywhere in your text, and it will be automatically replaced with the website name you specified above.
- Example: “Add {website_name} as your preferred source on Google”
- Example: “Get more content from {website_name} – add us as a preferred source”
-
Badge Language: Choose which language to use for the Google badge image. “Auto” detects your site’s language automatically and falls back to English if the language is not available. 17 languages are included: Danish, German, Spanish, Estonian, Finnish, French, Hindi, Hebrew, Japanese, Korean, Norwegian, Brazilian Portuguese, Russian, Swedish, Turkish, Ukrainian, and English. If your language is not listed, select “Custom text (my language is not listed)” – this lets you type your own button label, and a badge will be generated with the Google logo and your text, styled to match the official badges.
-
Badge Theme: Choose between the Dark (default) and Light versions of the badge. Dark works best on light-colored banner backgrounds; Light works best on dark-colored backgrounds.
-
Banner Position: Choose where the banner appears on your website:
- Top: Banner appears at the top of the page, above all content
- Bottom: Banner appears at the bottom of the page (recommended for better user experience)
-
After Visitor Closes Banner: Decide what happens when a visitor clicks the close (x) button:
- Hide it for a number of days (uses a cookie): The banner stays hidden for the duration you set in the Hide Duration (days) field (1-365 days, default 7). This matches the behaviour of earlier versions and remains the default for sites updating from an older version.
- Show it again on every page view (ignores the cookie): Closing the banner only hides it for the current page. It appears again on the next page view, wherever your Display Rules allow it. This is the default for new installs.
Step 2: Appearance Customization
-
Banner Background Color: Click the color picker to choose a background color that matches your website design. Default is dark gray (#1a1a1a).
-
Text Color: Select the color for the banner text and close button. Ensure good contrast with your background color for readability. Default is white (#ffffff).
Step 3: Display Options
-
Show on Mobile: Check this box to display the banner on mobile devices (phones and tablets).
-
Show on Desktop: Check this box to display the banner on desktop computers and laptops.
You can enable both, or choose to show the banner only on specific device types based on your audience preferences.
Notes on device detection:
- These settings apply to the banner only. The inline button appears on all devices regardless of these checkboxes.
- Device detection is user-agent based (WordPress’s
wp_is_mobile()function), so tablets are treated as mobile devices. - On sites with full-page caching, a cached page may have been generated for a different device type, so the banner can occasionally appear or stay hidden on the “wrong” device until the cache refreshes.
Step 4: Save and Test
- Click Save Changes to apply your settings
- Visit your website to see the banner in action
- Click the banner to test the Google redirect functionality
- Use the close (x) button to test the dismissal feature
Testing Tips:
* Clear your browser cache and any server/plugin caches after making changes
* Test in incognito/private browsing mode to see the banner fresh
* Add a parameter to your URL (e.g., ?test=1) to bypass cache
* Check on different devices based on your display settings
* The banner will stay hidden after a user closes it for the number of days you set (7 by default), unless you choose the “every page view” option
Preview Feature:
The settings page includes a live preview that updates as you modify colors, text, and position. This helps you see how the banner will look before saving changes.
Step 5: Display Trigger
Control when the banner appears to a visitor:
- Immediately on page load – the banner shows as soon as the page finishes loading (default behaviour).
- After user scrolls – the banner only appears once the visitor has scrolled a set percentage of the page. You can choose any value between 10% and 90% in 5% increments. Useful for keeping the banner out of the way until the reader is engaged with your content.
- After a time delay – the banner waits a number of seconds (1-60) before appearing. This lets visitors settle in before the prompt is shown.
Step 6: Display Rules
Target exactly which pages show the banner:
- Everywhere – the banner appears on all pages and posts across your site (default).
- Posts only – restricts the banner to single post pages.
- Pages only – restricts the banner to static WordPress pages.
- Front page only – shows the banner exclusively on your site’s home/front page.
You can further refine visibility with two exclusion options:
- Exclude Categories – search for and select any categories whose posts should never show the banner. The picker supports live search so you can find categories quickly without loading a long list.
- Exclude Post/Page IDs – enter a comma-separated list of post or page IDs to suppress the banner on specific pieces of content.
**Step 7: Analytics …
Screenshots
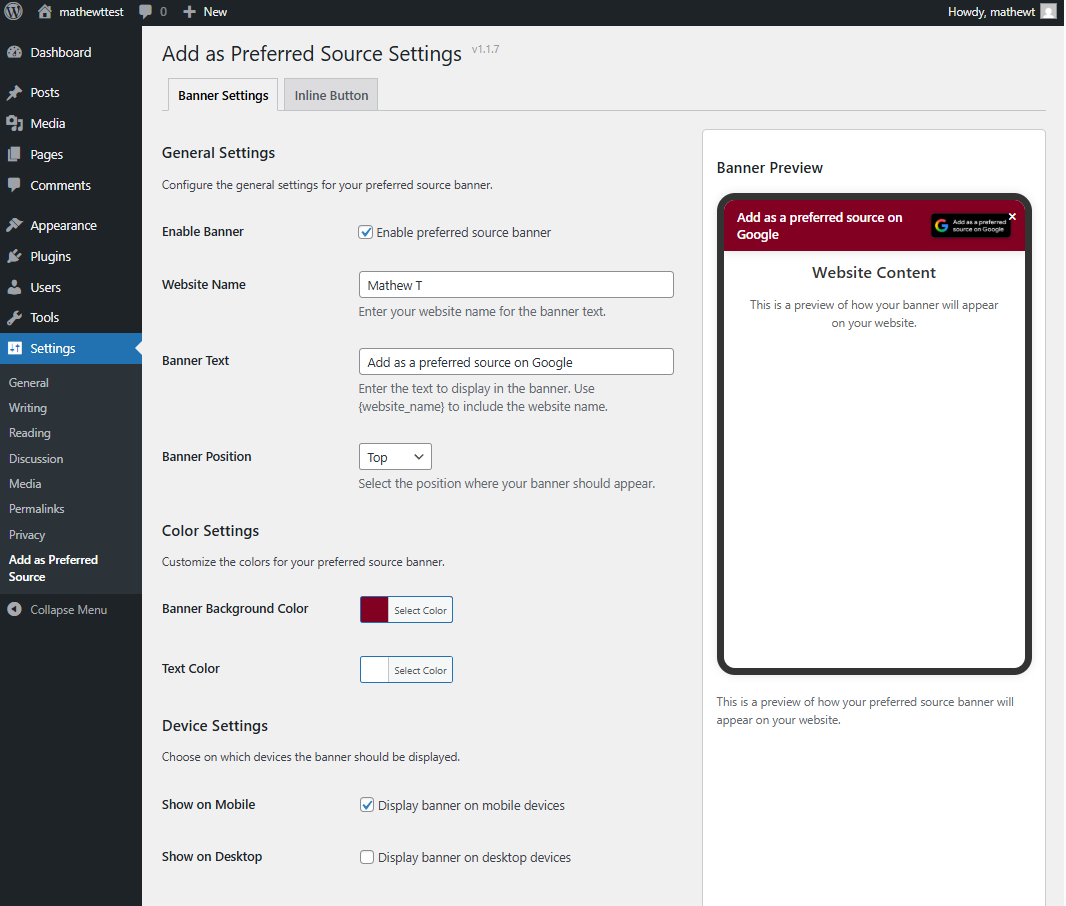
Plugin settings page with customization options and live preview
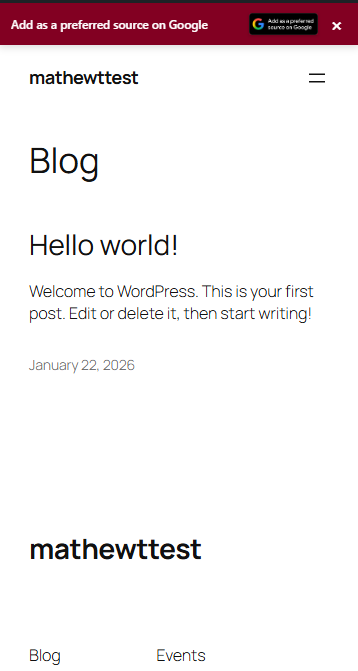
Banner display on website frontend as top
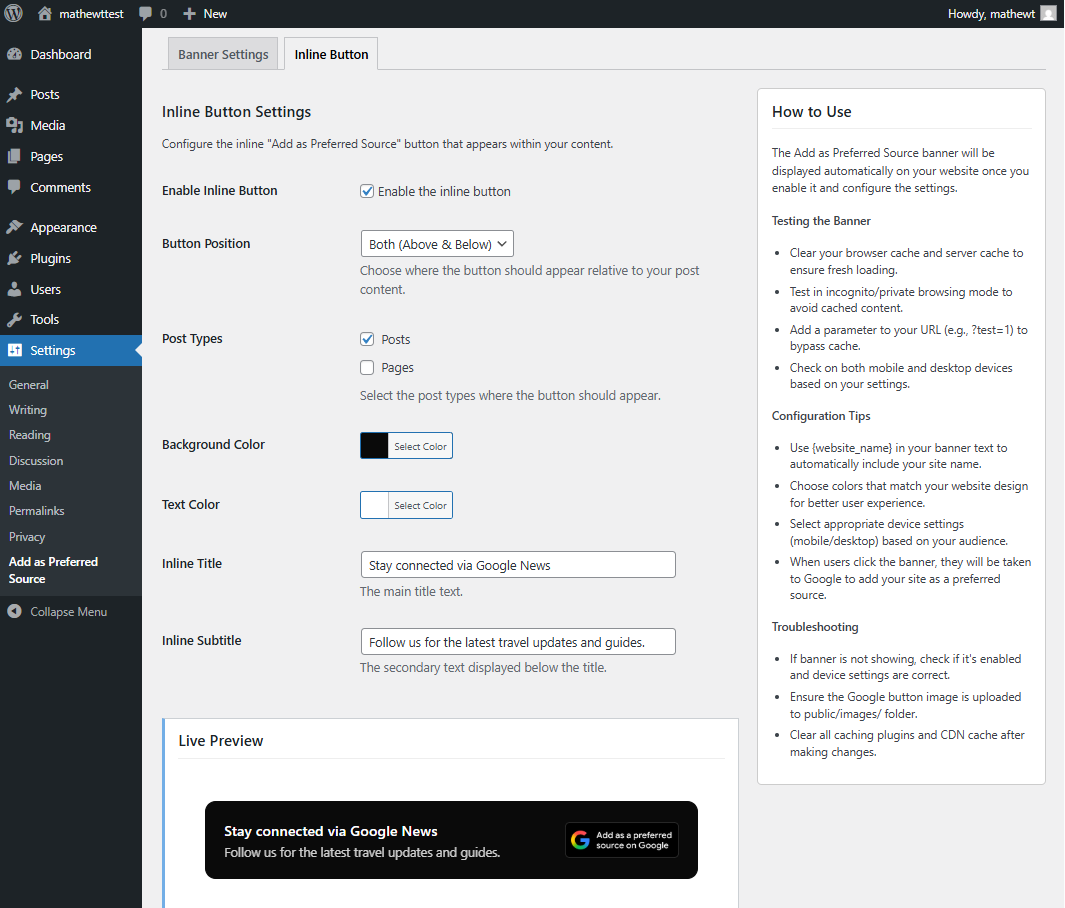
Inline button card settings page with customization options and live preview
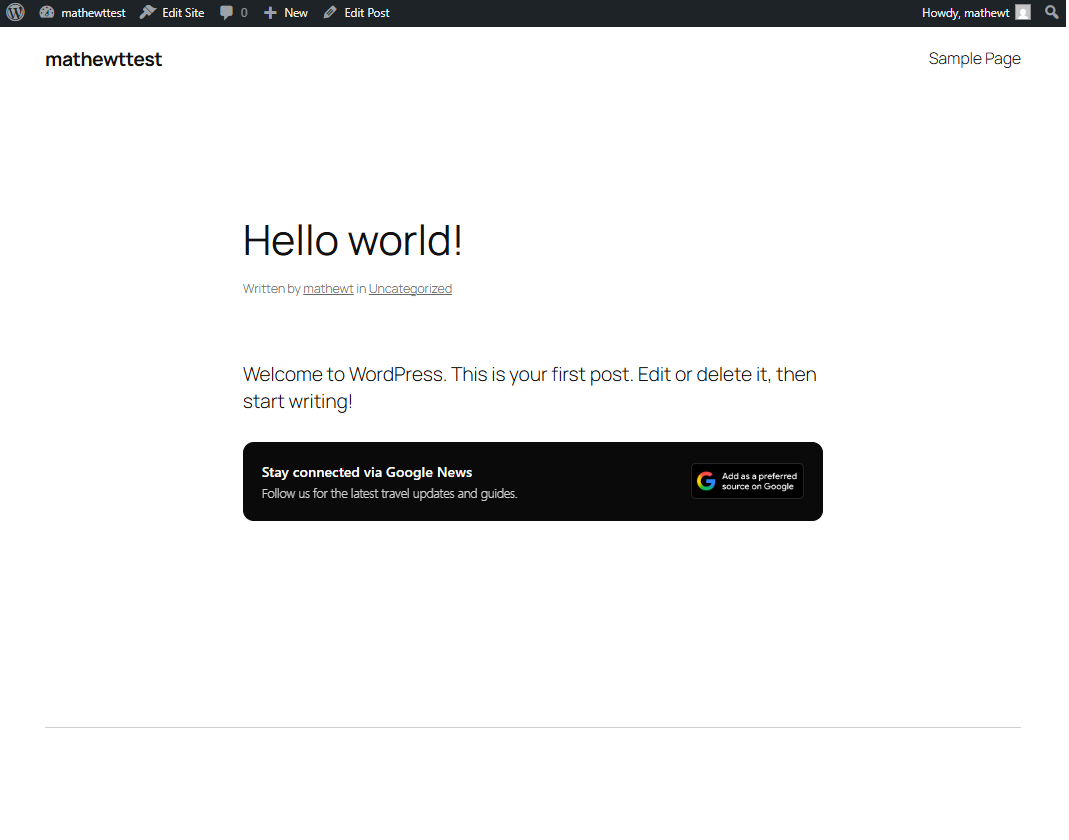
Inline button display on website frontend