BACK TO DIRECTORY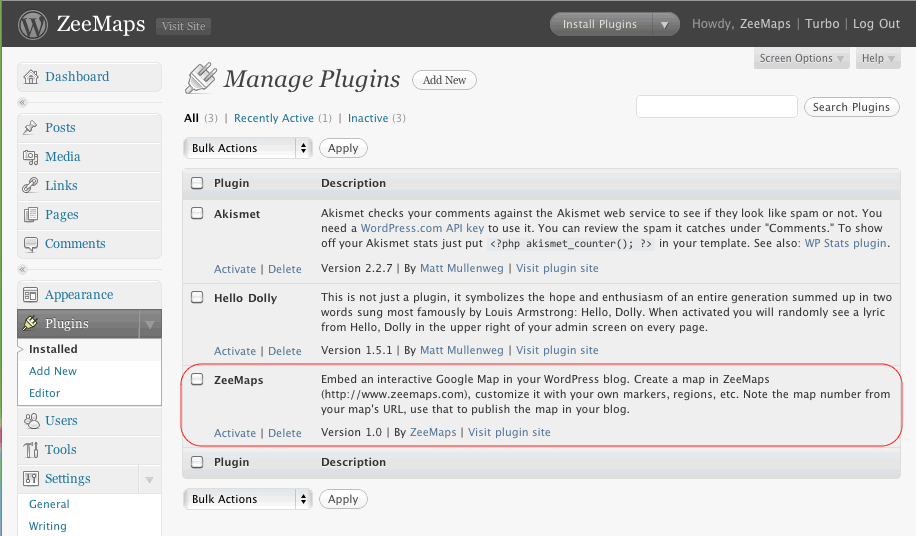
With a few simple clicks, you can post a customized, interactive Google Map in your
blog. Follow these simple steps to post your map:
- Go to the ZeeMaps server (http://www.zeemaps.com) and create your map
- Add markers, regions to your map
- Add one marker at-a-time, using Additions->Add Marker menu item, or use Additions->Upload CSV to add multiple markers from a CSV file or Google Spreadsheet
- After your map is done, note the map number for your map (the number on the map URL after the parameter group=)
- Make sure you have the ZeeMaps plugin downloaded and activated
- Go to edit your blog entry
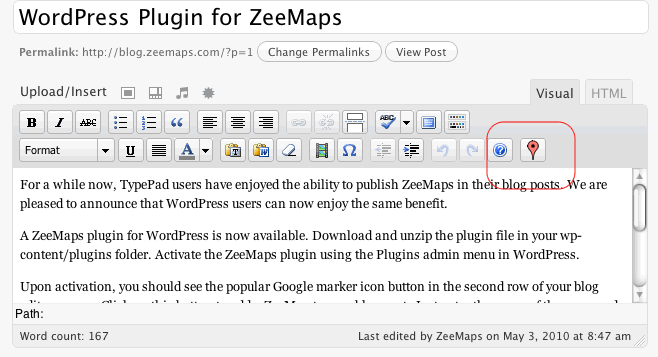
- In the second row for your blog editor menu buttons, you should see a new button with the Google marker icon
- Place your cursor in the location where you want to publish your map in the editor window
- Click on the Google marker icon button
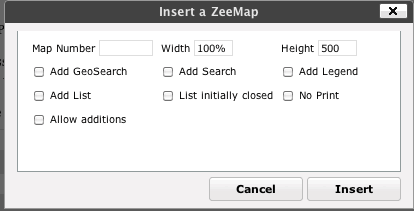
- Enter your map number and customize your published map in the resulting dialog
- Click on the insert button
This should add some text to your blog like:
[zeemaps 45 w=100% h=500 add geosearch]
This text will be replaced by the map in your blog.
Screenshots
Shows the ZeeMaps plugin listed in the Plugins Admin page.
The Google Marker icon button for adding a ZeeMap to your blog.
Dialog to customize your published map.
Plugin Details
Active Installs
40Total Downloads
4,704Version
1.3Requires WP
2.9.2Requires PHP
—Tested Up To
3.9.40Added
2010-05-10Last Updated
2014-07-30 8:10pm GMTRatings
5
0
4
0
3
0
2
0
1
0